Virtual Robot Racing League
Developer Center

This guide will get you set up with a VRRL development environment as quickly as possible.
Step 1: Install Microsoft's Visual Studio (v2017 is recommended, but pretty much any version should work fine).
Step 2: Download the API and Testbed from our Downloads page. Extract the DLL file from the VRRL API zip file and place it in a memorable folder (the project's root folder is a good option).
Step 3: Open Visual Studio and select "New Project" from the "File" menu. Choose the "Class Library (.NET Standard)" template and enter the name of your AI project in the text fields on the bottom. You can also choose where you want your project to reside on your computer (or just leave it at the default if you're not sure). When you're ready, press OK.
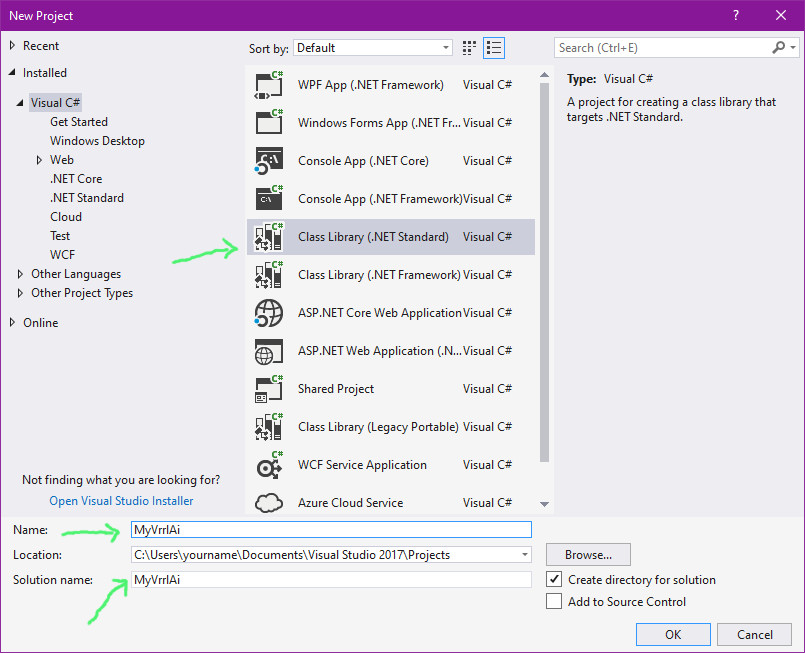
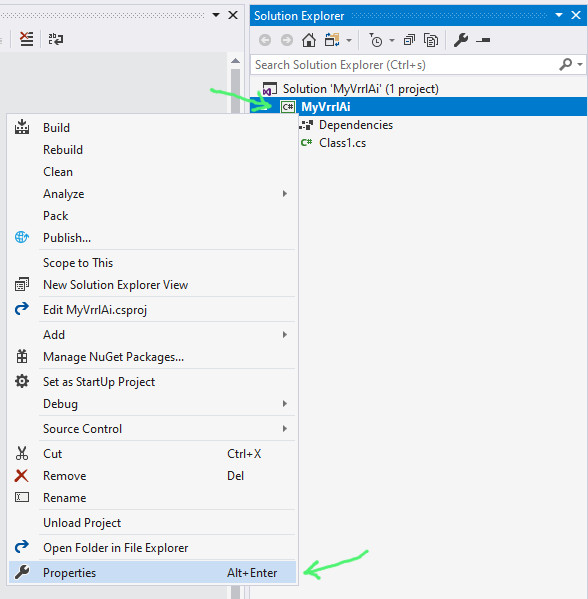
Step 4: Once the project loads up, right click the project name in the Solution Explorer pane and choose the Properties option.
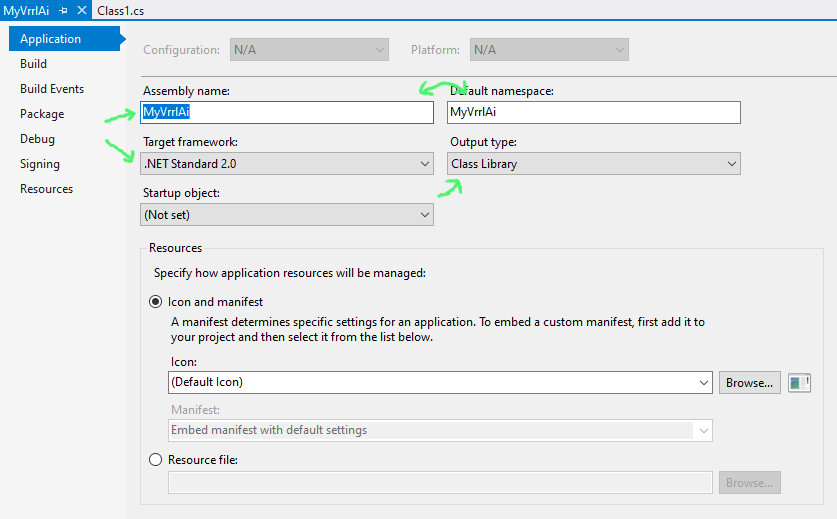
Step 5: From here you can change the name of your project if you want to, but the Assembly Name should generally match the Default Namespace if possible. Make sure the Target Framework is set to .NET Standard 2.0 and the Output Type is set to Class Library. You can close the project tab when finished here.
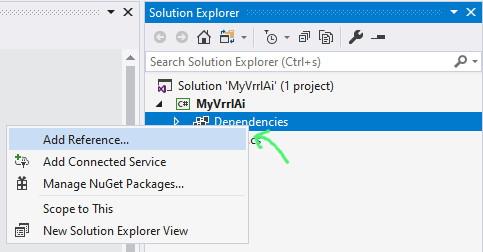
Step 6: Next, back in the Solution Explorer pane, right click the Dependencies node under your project and choose the Add Reference option.
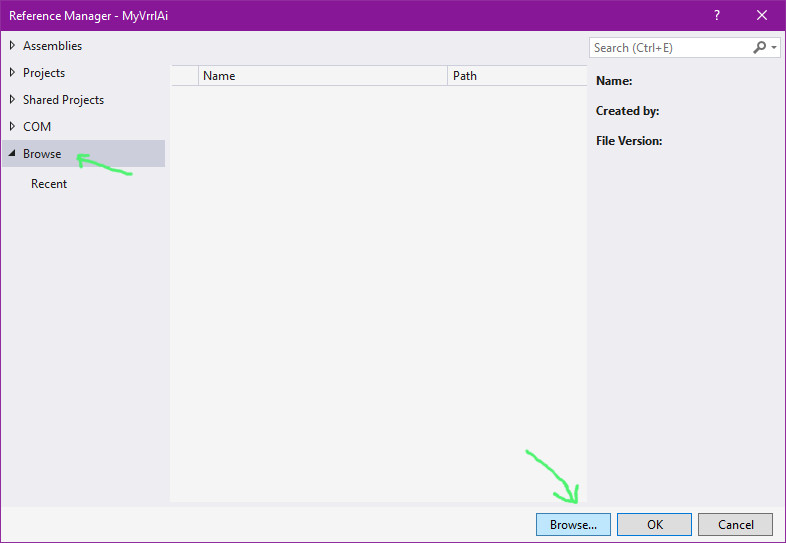
Step 7: Choose the Browse tab on the left, and then click the Browse button on the bottom right. Choose the VirtualRobotRacingBase.dll you extracted earlier. Press OK.
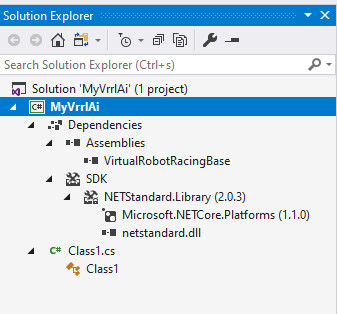
If you unfold all options in your Solution Explorer pane, it should now look like this:
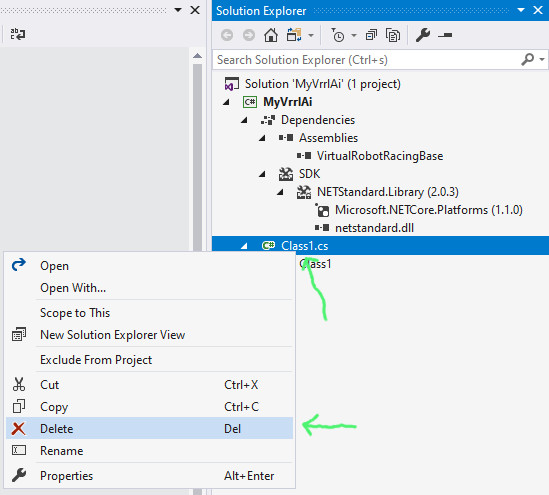
Step 8: Next, delete the generated Class1.cs by right-clicking it and choosing Delete, and then press OK on the confirmation.
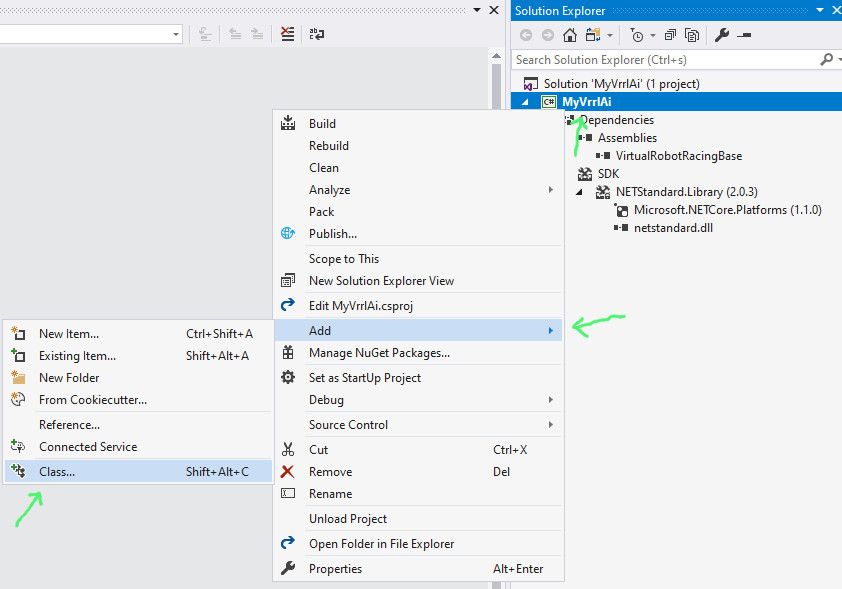
Step 9: Back in the Solution Explorer pane, right click the project node, choose Add and then Class.
Step 10: For this example, we'll call our AI Controller class "MyAiController.cs" but you can name yours as you like.
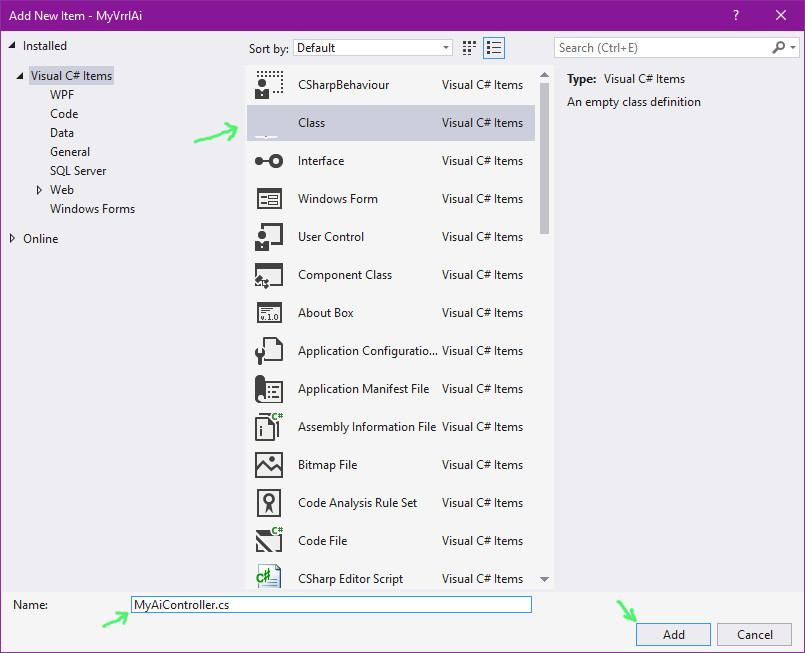
Step 11: Open the new C# file and replace the contents with the following:
The two key components here are that we've included the LucidSilenceGames.VirtualRobotRacing.Controllers namespace and derived our new class from the RobotController base class. Be sure to replace MyAiController with your own class name if you've chosen a different one.
Step 12: Next, we need to create the Startup class to link the AI with the robot. Right-click the project node in the Solution Explorer pane, choose Add and then Class.
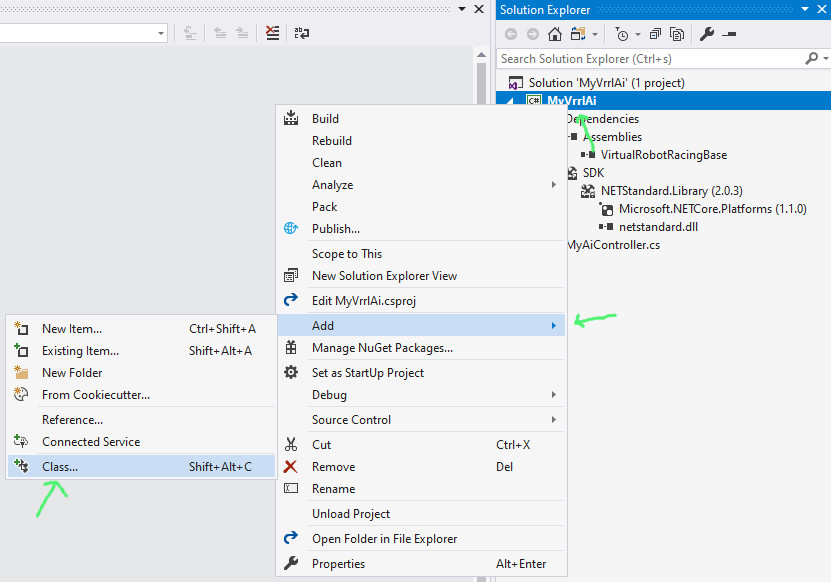
Step 13: This class must be named "Startup.cs". Press OK when you've named it.
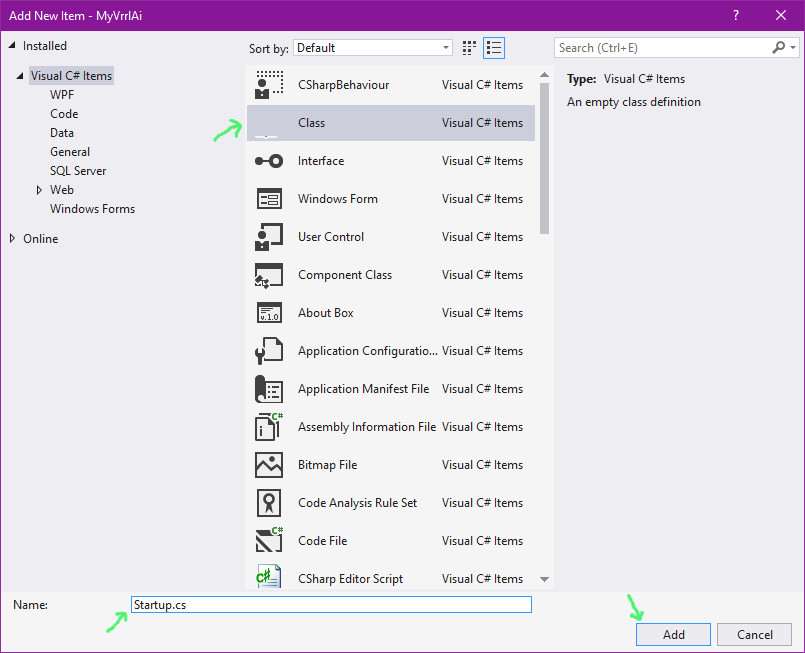
Step 14: Open Startup.cs. Copy and paste the below code into it:
There are two elements you may need to change here:
Step 15: Now, let's close the Startup class and go back to your AI class. We need to add a few required functions before this project will build. Copy and paste the following functions into your AI class (you can also right-click the class name in the code file, choose Quick Actions, and then Implement Abstract Class).
The InitializeRobot() function is called after the connection between the robot and your controller is established. Once this function is called, it's safe to access your controller's Robot reference.
The ProcessSignalFromArena() function is called any time the race course arena sends a message to your robot/controller. Be sure to process these messages so you don't break the rules.
The UpdateRobot() is your standard update tick function, called (usually) 50 times per second (see the ITimeSensor class for information about exceptions to the rule).
You should now have your environment set up to develop your AI. If you want a tip with where to start, check out the interfaces documented in the Robots namespace, including Sensors (to understand the world around your robot) and moving parts; such as gyroscopes, propellers, wheels, and thrusters.
Once you've written some code, build your project, and follow the instructions on the How to Test guide page.